How to Paint Metallics on Miniatures
Learn how to paint metallics on miniatures with simple techniques for armor, swords, and shields that look great on the tabletop.
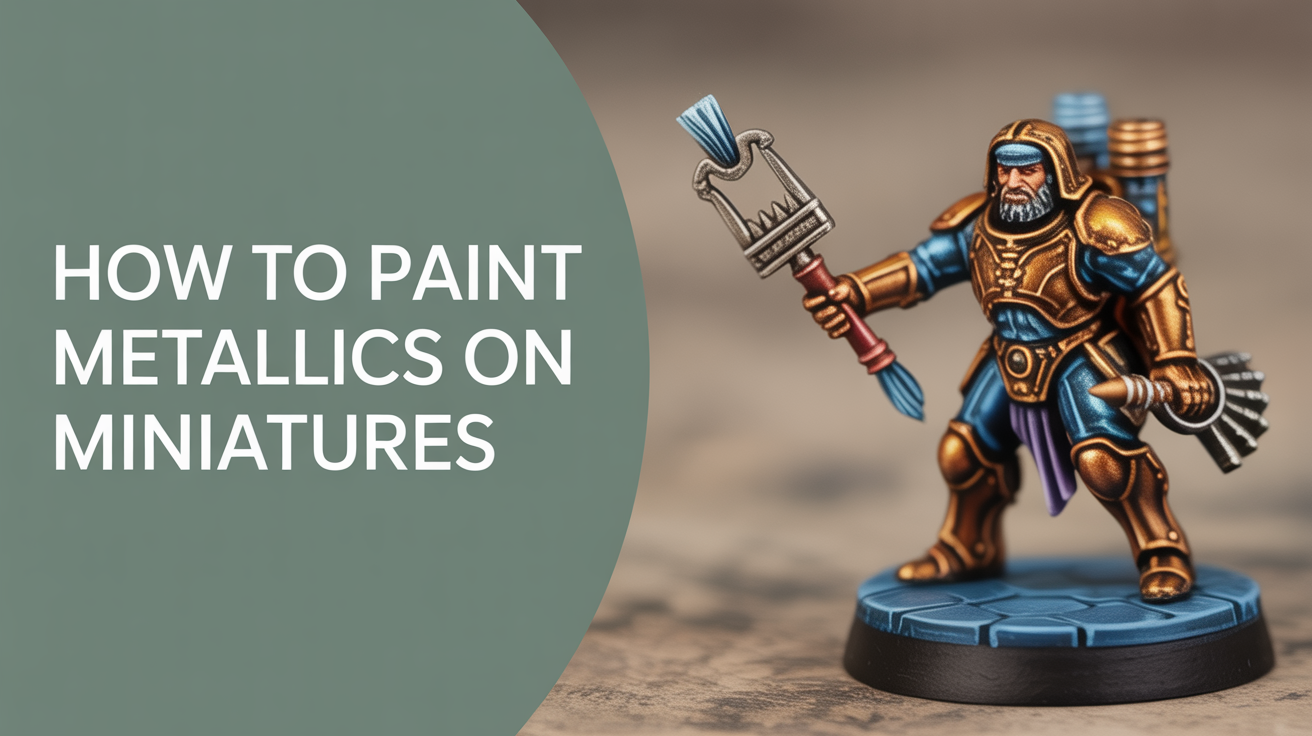
Metallic surfaces trip up a lot of beginners. The paint looks muddy in the pot, dries differently than regular acrylics, and somehow the finished result ends up looking flat. Here is the short answer before we go deeper: metallics need a dark base, good coverage, and a wash to knock them back into the recesses. Follow those three steps and most armor and swords will look solid on the table.
True Metallics vs. Non-Metallic Metal
Before buying paint, it helps to understand what your options are.
True metallic paints (TMM) contain tiny metal or mica flakes suspended in acrylic medium. They physically reflect light, which gives them a natural sparkle. These are the paints labeled "metallic" or "gold/silver" on the pot. They are the easiest approach for beginners.
Non-metallic metal (NMM) is a painting technique that fakes the look of metal using only regular matte paints. The painter manually adds the highlight and shadow in the right spots so the eye reads the surface as shiny. It can look stunning at high levels of skill, but it takes real practice to pull off. If you are new to miniatures, start with true metallics.
For most people starting out, a pot of silver, a pot of gold, and a dark brown or black wash are enough to paint a convincing batch of armored warriors.
How to Prepare Before You Paint Metal
Metallics behave differently from regular acrylics, and prep makes a visible difference.
Prime in black. A black primer under metal paint gives the whole surface a dark undercoat. Any thin spots in your metallic layer look like shadow rather than bare plastic. Dark primer also makes the contrast between recesses and raised edges much stronger. If you have already primed in grey or white, painting a thin black layer over the areas you plan to paint metallic achieves the same result.
Make sure the surface is clean and dry. Metallics sometimes struggle to stick to oily or dusty surfaces. If a metal miniature has been handled a lot, a light scrub with dish soap and water before priming helps.
Shake the pot or stir it well. The flakes in metallic paint settle fast. A minute of shaking before you open the pot, and another quick stir with a toothpick once it is open, makes a real difference to coverage.
Applying Metallic Paint
Start by base coating your miniature's other areas first, then come back to the metallics last. That order makes it easier to clean up any stray metallic strokes.
Load a small round brush, maybe a size 1 or 2, with your silver or gold paint. You want the brush damp but not soaked. Two thin coats cover better than one thick one, and thick metallic paint clogs detail badly.
For large flat areas like chest plates or shields, a slightly larger brush and long, smooth strokes reduce visible brushmarks. For sword blades, work along the length of the blade rather than across it.
Coverage tip: Metallic paints sometimes need three thin coats to look fully opaque over black primer, especially lighter silvers. That is normal. Let each coat dry before adding the next.
Adding Depth With Washes
This is the step that takes flat metallic paint and makes it look like real armor. After your metallic is fully dry, apply a dark wash over the whole area.
A brown-black wash (sometimes called a dark tone, strong tone, or sepia tone depending on the brand) works for gold. A pure black wash or a blue-tinted wash works well for silver. The wash flows into the recesses and lines between armor plates, creating instant shadow with almost no effort.
If you are unfamiliar with how washes work, the guide on using washes to shade your miniatures walks through the full process.
Once the wash dries, the raised surfaces still have their metallic sheen, but the recesses are now darker. That contrast is what gives the model visual weight.
Edge Highlights on Metal
Highlighting metallics is optional for tabletop paint jobs, but a single pass of highlight takes maybe five minutes and improves the result noticeably.
After the wash has dried completely, load a small amount of a lighter metallic onto the tip of a fine brush. A size 0 or 00 works well here. Gently drag the very edge of the brush along the raised edges of armor plates, the spine of a sword blade, and the top of any rivets or raised detail.
The goal is a thin bright line, not full coverage. If the edge looks too heavy, a second thin wash after highlighting tones it back down without losing the effect.
For a more detailed walkthrough of where to place highlights, drybrushing is a faster alternative that works particularly well on chainmail and rough metal textures.
Common Metallic Paint Problems
| Problem | Likely Cause | Fix |
|---|---|---|
| Paint looks streaky | Paint too thick or brush too dry | Thin slightly with water, reload brush more often |
| Surface looks dull after drying | Not enough flakes in the mix | Shake or stir the pot and apply another thin coat |
| Recesses look muddy, not dark | Wash applied too thick | Less wash next time; clean up pooling with a damp brush while wet |
| Gold keeps looking orange | Starting with a warm brown base | Prime black or apply a thin black base layer first |
| Silver looks grey, not shiny | Undercoat too light | Dark primer solves this for future models |
Frequently Asked Questions
Do I need expensive metallic paints to get good results?
No. Most beginner metallic ranges from established acrylic brands perform well, and an entry-level silver plus a basic wash gets you most of the way there. Price differences matter more at competition level than on the tabletop. Buy from a hobby shop or online retailer that lets you return opened pots if a formula does not suit you.
Can I mix metallic paints with regular acrylics?
Yes, though the metallic effect weakens the more matte paint you add. Small amounts of matte medium or regular color can shift the hue of a metallic without killing the sheen. Adding too much matte paint turns the metallic into a flat, pearlescent color.
Is an airbrush better for metallics than a brush?
An airbrush can give smooth, even coverage on large flat areas like vehicle panels or big armor pieces. For most miniatures with detail, a hand brush gives you more control. If you use an airbrush, make sure your workspace is well ventilated and wear an appropriate mask. Follow all safety guidance from the paint manufacturer for airbrush use.
What is the difference between gold and silver metallic paints?
Aside from color, gold metallics usually have a warmer tone and can look muddy if applied over light colors. Silver metallics tend to be more neutral. For best results with gold, always work over a black or very dark base, and add a warm brown wash rather than black to avoid making the gold look dirty.
Do metallics need a varnish or sealant?
Yes. Metallic paints are a bit more fragile than matte acrylics and benefit from a protective coat. A satin or gloss varnish tends to preserve the sheen better than matte varnish, which can dull the reflective flakes. If you prefer a matte finish overall, you can apply a gloss coat first, then a very light mist of matte varnish to reduce the shine without killing it entirely.