Edge Highlighting Miniatures the Easy Way
Learn how to edge highlight miniatures with thin paint and a steady brush. A beginner-friendly guide to brighter, sharper-looking minis.
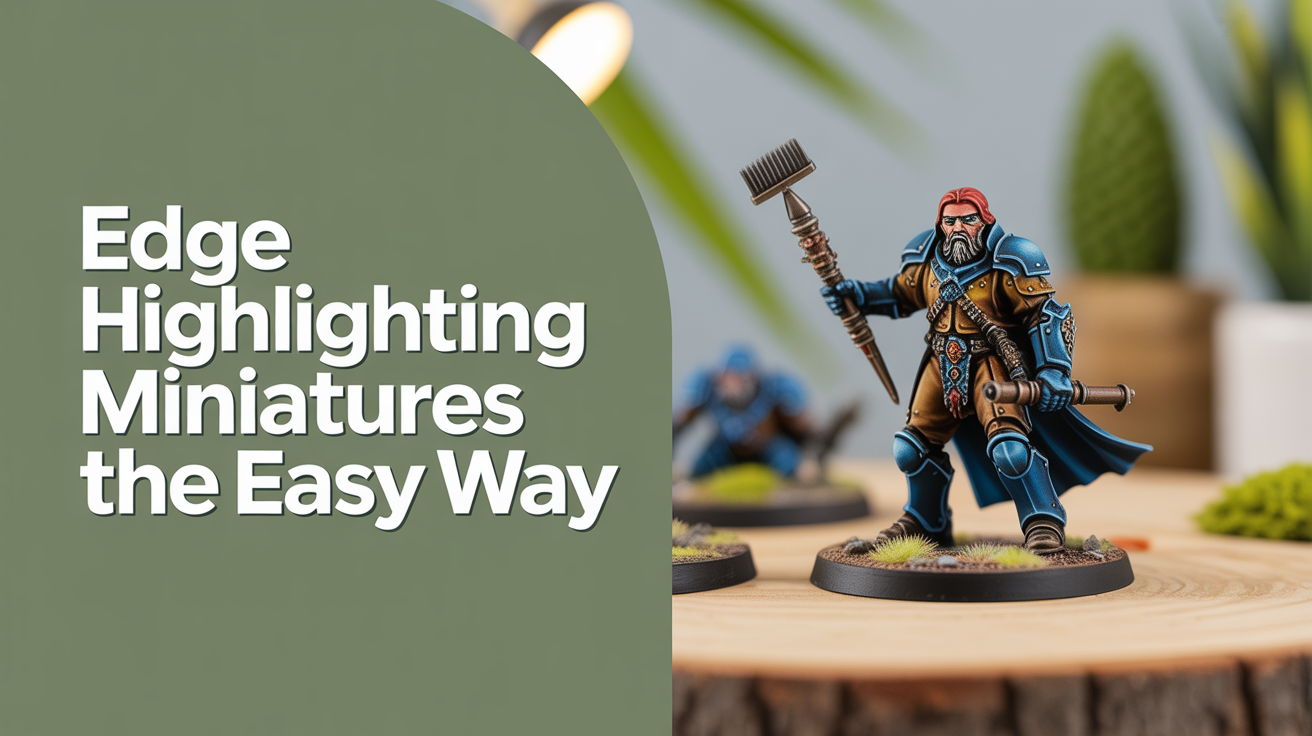
Edge highlighting is the step that makes a miniature look finished. You paint a thin line of lighter color along the raised edges and corners of the model, and the whole thing suddenly reads more clearly across the table. It looks complicated, but the technique comes down to paint consistency, brush control, and a little patience.
This guide walks you through the process from start to finish, including what to do when the line comes out too thick or too wobbly.
What Edge Highlighting Actually Does
Your miniature has a lot of geometry. Corners, ridges, armor plates, pouches, clothing folds. In real life, light naturally catches those raised points and makes them appear brighter than the surrounding surface. Edge highlighting mimics that effect artificially.
After you have laid down your base colors and applied a wash to shade the recesses, the model can look flat or muddy. Edge highlighting fixes that. It pulls the detail back out and gives the surface a sense of depth.
You are not painting the whole surface lighter. You are painting only the very edge of each raised surface, the physical corners and ridges where two faces of the model meet.
What You Need Before You Start
You do not need special equipment. Here is what makes the job easier:
| Item | Why it matters |
|---|---|
| A small detail brush (size 0 or 1) | The tip needs to hold a point without fraying |
| Your base color paint | You will mix a lighter version from this |
| A lighter paint or white | Mix a small amount with your base color |
| A wet palette or tile | Keeps paint workable for longer |
| Water for thinning | Thin paint flows better along edges |
| A dry piece of cloth or paper towel | Wipe the brush to the right load before each stroke |
You do not need to buy a dedicated "edge highlighting brush." A good quality size 0 or 1 brush with a fine point does the job. If your brush tip splits or frizzes when wet, it is time to replace it.
How to Mix the Right Highlight Color
Take the paint you used for your base coat and mix in a small amount of a lighter color. A common approach is to add a cream, off-white, or pure white in a roughly 1:1 ratio with the base paint to start. Test the result on a piece of paper.
For a single edge highlight, you want a color that is clearly lighter than the base but still recognizably the same hue. If you are doing a two-stage highlight, mix a second batch that is even lighter still.
Thin the paint so it flows off the brush tip without pooling. It should feel like a slightly watery consistency, not as thin as a wash, but not thick like it comes straight from the pot. If you drag a loaded brush across a tile and the line dries patchy or breaks up, thin it more.
The Core Technique: How to Paint the Line
This is where most beginners feel nervous. The good news is that the stroke itself is simple once the brush is loaded correctly.
Load and Wipe
Dip the brush tip into the paint. Then drag the side of the brush once or twice across a dry cloth or paper towel. This does two things: it shapes the tip back to a point and removes excess paint so the brush does not dump a blob when it touches the model.
The amount of paint left in the brush after wiping should be just enough. You want the tip to feel almost dry. If you press the brush to a scrap piece of paper and barely a mark appears, that is about right.
Find the Edge
Look at the model under a lamp. The edges you want to highlight are the physical corners where two surfaces meet. On an armor plate, that is the outer rim. On a face, it might be the brow ridge and the cheekbones. On a boot, it is the toe cap and the lacing ridge.
Run your finger lightly over the model before painting. You can actually feel where the raised edges are.
The Stroke
Place the very tip of the brush at the start of an edge and drag it along in one smooth, slow motion. Do not press the brush down. You are using just the point, not the belly of the bristles.
Keep the stroke slow and consistent. Fast strokes tend to skip and produce dotted lines. Slow, deliberate strokes let the paint flow evenly.
Short edges (2-3mm) are easier than long ones. For a long edge, break it into smaller overlapping strokes rather than trying to run the whole thing in one go.
When the Line Goes Wrong
- Too thick: The brush had too much paint or you pressed too hard. Wipe the line away with a damp brush while it is still wet, let it dry, and try again with less paint.
- Too thin or invisible: The paint was too dry or the color too close to the base. Add a touch more paint to the brush or mix a slightly lighter color.
- Wobbly: Rest your painting hand against the model or the edge of the table. Even a small point of contact steadies the stroke.
- Blobbed at the start: Start the stroke just past the very beginning of the edge, then come back and fill the first millimeter with a tap of the brush tip.
Building Up Multiple Layers of Highlight
Once the first highlight is dry, you can add a second, brighter line on the sharpest corners and most prominent edges only. This is called a two-stage or "hot point" highlight.
The second highlight is even more selective. Apply it only to the most exposed corners: the tip of a shoulder pad, the point of a knee, the very peak of a nose. Keep this layer very small, just a dot or a couple of millimeters of line. It creates the impression that light is really catching those specific spots.
Some painters add a third or even fourth stage for competition-level work, but for tabletop painting, two stages are plenty. The goal is minis that look good at arm's length, not under a magnifying glass.
For a broader foundation before starting edge work, the drybrushing guide covers a faster technique that does similar work on textured surfaces.
Common Beginner Mistakes to Avoid
- Skipping the wipe. Loading the brush and going straight to the model is the single biggest cause of blobs.
- Painting every edge at the same brightness. Let the logic of light guide you. Not every surface is equally lit.
- Rushing. Edge highlighting takes longer than base coating or washing. Give each line time to dry before painting next to it.
- Using paint straight from the pot. Pot-consistency paint is almost always too thick for highlight lines. Thin it.
- Being too precious about mistakes. A bad line can be touched up with the base color. Nothing is permanent.
Frequently Asked Questions
Do I need to edge highlight every part of the model? No. Focus on the most visible areas: faces, weapons, large armor plates, and clothing on the upper body. Underneath boots, inside cloaks, and deep recesses that would never catch light can be left alone. Selective highlighting looks more natural and saves time.
What is the difference between edge highlighting and layering? Layering covers a larger area and blends gradually into the base color. Edge highlighting is just the very outermost edge, a thin line with no blending. Both techniques build toward the same goal (the illusion of light), but edge highlighting is faster and works well for hard-edged surfaces like armor and metal.
My highlight keeps drying before I finish the stroke. What is wrong? The paint is too thin, the room is too warm, or you are painting too slowly. Mix slightly thicker paint and try to keep your strokes a bit brisker. Working in a cooler spot, or using a wet palette to keep paint from drying out in the mix, also helps.
Do I have to edge highlight if I already drybrushed? Drybrushing and edge highlighting are different tools. Drybrushing works well on textured surfaces and gives a broad, quick hit of lighter tone. Edge highlighting gives precise, clean lines on flat surfaces like armor plates. On many miniatures, a quick drybrush followed by targeted edge highlighting on key areas gives the best results for the time spent.
Can I use a contrasts or speed paint instead of mixing my own highlight? Not directly, those formulas are designed to flow into recesses, not sit on an edge. For highlights you want an opaque, matte acrylic in a lighter shade. However, once your highlight lines are dry, a very thin glaze of contrast paint over the whole surface can help unify the colors if the highlight looks too stark.