How to Assemble and Prep a Miniature for Painting
Learn how to assemble miniatures, clean mold lines, and glue parts so your model is ready to prime and paint.
Getting paint on a miniature is satisfying. Getting paint on a miniature that falls apart halfway through? Less so. A little time spent assembling and prepping your model before the first brushstroke makes every step after it easier and produces cleaner results.
This guide walks through the whole process: cleaning up the plastic or metal, deciding what order to glue things, and getting the surface ready for primer.
What You Need Before You Start
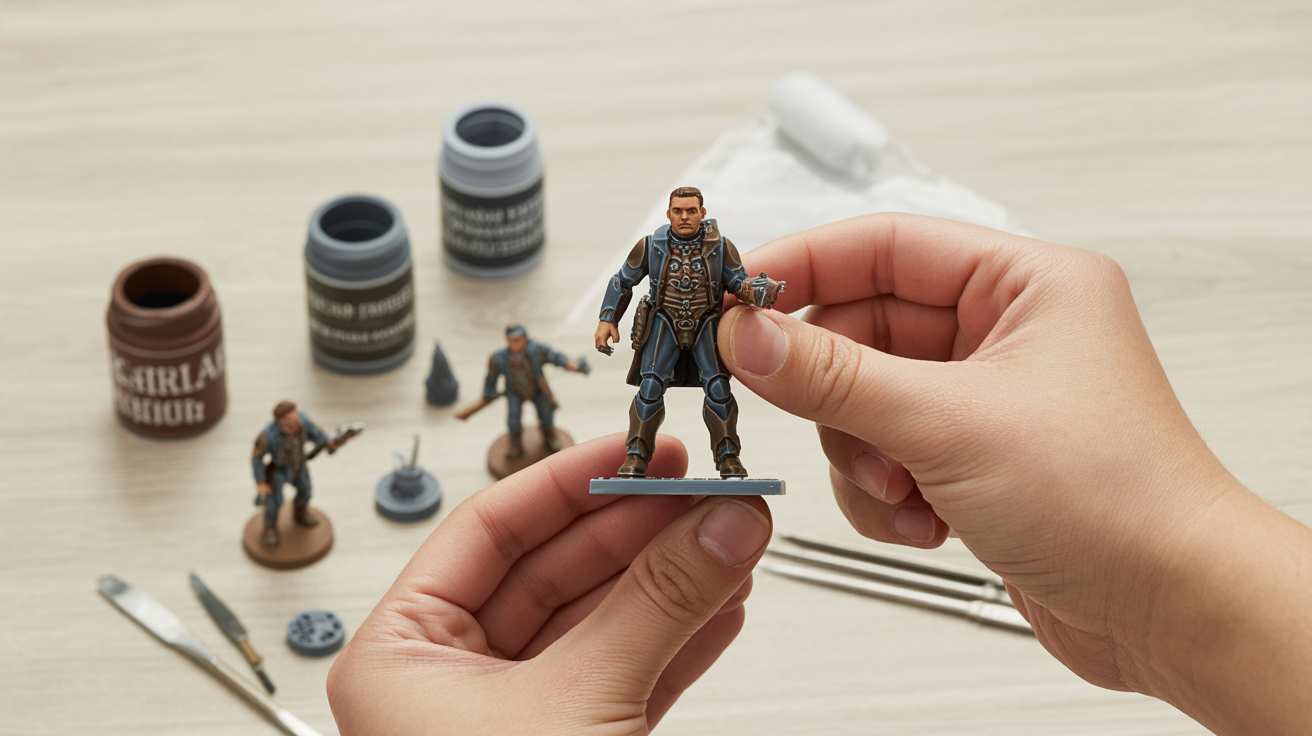
You don't need a lot. A sharp hobby knife, a pair of clippers (often called sprue cutters or nippers), some sandpaper or a nail file, and the right glue for your material will cover almost every situation.
Glue by material:
| Material | Best adhesive |
|---|---|
| Plastic (polystyrene) | Plastic cement (model glue) |
| Resin | Cyanoacrylate (super glue) |
| Metal | Cyanoacrylate (super glue) |
| Mixed (plastic + resin) | Super glue |
Plastic cement works by slightly melting the plastic at the joint, which creates a weld rather than just a sticky bond. That makes it stronger than super glue for plastic kits. For everything else, super glue is what you want. A gel formula is easier to control than thin liquid on small parts.
Removing Parts from the Sprue
Most plastic miniatures come on a frame called a sprue. Use your clippers to cut each part free, but don't cut right at the part. Leave a small stub of plastic on the piece, then come back and trim the stub with the knife. Cutting directly at the part risks crushing or nicking the detail.
Once the piece is free, look at the attachment point and trim any remaining nub flat with your knife. A light pass with sandpaper smooths it further if needed. This is quick work and becomes second nature after a few models.
Cleaning Mold Lines
Mold lines are raised seams left behind when the mold halves that formed the miniature were pressed together. They run along the surface of the model, sometimes across faces or armor, and they show up clearly after painting if you leave them. Cleaning them off now takes a few seconds per part.
Run your knife along the line at a low angle, almost scraping rather than cutting. The goal is to shave the raised line down flush with the surface. Work in short passes, check your progress in the light, and move on when the line is gone. Very soft detail (like fur or cloth) can be carefully filed with a fine nail file instead of a knife to avoid cutting into the texture.
Resin and metal parts sometimes also have flash, which is a thin film of material across gaps or undercuts. Trim and file this away the same way.
Assembly Order and Dry Fitting
Before you glue anything, hold the parts together and check how they fit. This is called dry fitting, and it saves a lot of frustration. Some parts only go together one way, while others have a bit of wiggle room you can use to pose the model.
A few rules that help with assembly order:
- Glue larger structural parts first (torso to legs, for instance), then attach arms and heads.
- If the arms or weapon hands will make a section hard to paint, leave them off until the basecoat is done or mostly done.
- On very complex models with lots of overlapping pieces, paint sub-assemblies separately and glue them together near the end.
You don't have to paint everything as one piece. Painting the face separately and attaching the head at the end is a common approach because reaching into a helmet or hood with a brush is genuinely difficult.
Gluing Parts Together
Apply a small amount of glue to one surface, press the pieces together, and hold them for a few seconds. With plastic cement, the bond forms in under a minute but reaches full strength after a few hours, so try not to stress the joint while it's fresh.
For super glue joints that don't hold well (thin contact areas on metal arms are a classic example), pin the joint. Pinning means drilling a small hole in each piece and gluing a short piece of wire or a cut pin across the joint. It takes an extra five minutes but produces a joint that won't snap off on the table. A 0.8 mm or 1 mm drill bit handles most applications.
Gaps sometimes appear at joints, especially on metal or resin models. Green Stuff (a two-part epoxy putty) or any hobby filler putty can be pressed into the gap, smoothed with a wet fingertip, and left to cure before painting. It sands and takes paint exactly like the rest of the model.
Final Surface Prep Before Priming
Once the model is fully assembled (or in the sub-assemblies you've chosen), look it over under a good light. Check for:
- Any mold lines you missed
- Glue smears on detail areas (plastic cement can slightly blur the surface if it spreads; super glue sometimes leaves a white residue)
- Remaining gaps that need filling
A light wipe with a cotton swab dipped in isopropyl alcohol cleans off any oils from your hands, release agent residue on resin, or fingerprints on metal. This step is especially worth doing on resin and metal models because oil and residue can cause primer to bead or peel.
After the alcohol dries, your model is ready to prime. See how to prime a miniature and why priming matters for the next step, or if you're deciding what color primer to use, black, white, grey, or zenithal: choosing a primer color covers your options. For application method, brush-on vs spray vs airbrush primer compares all three.
Frequently Asked Questions
Do I have to clean mold lines? They look small.
They look much larger after painting because paint pools in any raised seam and makes it obvious. A minute or two per part is worth it on anything you plan to actually paint.
Can I use regular super glue from a hardware store?
Yes, it works. Hobby brand super glue comes in small bottles with thin applicator tips that are easier to control on small parts, which is the main practical difference. If you have hardware-store super glue, use a toothpick to apply tiny amounts and it works fine.
My parts don't fit well and there are big gaps. What should I do?
Fill them with hobby putty before priming. Green Stuff is the most common option and is widely available. Press it into the gap, smooth it wet, let it cure for several hours, then prime and paint as normal.
Do I need to pin every joint?
No. Plastic kits glued with plastic cement rarely need pinning because the weld is strong. Pinning matters most for heavy metal parts, large contact areas on resin models, and any joint that will take stress (like a weapon arm on a model that gets handled a lot).
Should I wash resin models before assembly?
Yes. Resin miniatures are typically cast with a mold release agent on the surface. Washing in warm soapy water and rinsing thoroughly removes it before you assemble and prime. Skipping this step can cause primer and paint to not adhere properly.